Viking ovens feature a self-cleaning mode that uses high temperatures to burn food residue. This convenient process locks the door for safety, requiring proper preparation and following specific guidelines for optimal results.
Overview of Viking Oven Self-Cleaning Feature
The Viking oven self-cleaning feature is a convenient and efficient way to maintain your appliance. It uses high temperatures to burn food residue, leaving a light ash that’s easy to wipe away. This process eliminates the need for harsh chemicals, making it a safer and more eco-friendly option. The oven door locks during the cycle to ensure safety, and the duration typically ranges from 2 to 4 hours, depending on the soil level. Proper preparation, such as removing racks and utensils, is essential for optimal results. After the cycle, the oven cools down, and the ash can be easily cleaned with a damp cloth. This feature not only saves time but also helps maintain the oven’s performance and appearance over time. Regular use of the self-cleaning function is recommended to prevent grease buildup and keep your Viking oven in pristine condition.
Importance of Proper Self-Cleaning Techniques
Proper self-cleaning techniques are essential for maintaining the performance, safety, and longevity of your Viking oven. Neglecting to follow the recommended self-cleaning procedures can lead to grease buildup, which may cause smoke, odors, or even fires during future use; Additionally, improper techniques can damage the oven’s interior or harm its components. Always remove racks, utensils, and excessive food debris before starting the cycle to ensure optimal results. Wipe up spills and splatters beforehand to prevent excessive smoke and flare-ups during the high-heat cleaning process. Avoid using harsh chemicals, as they can damage the oven’s finish or harm its self-cleaning functionality. By adhering to the manufacturer’s guidelines, you ensure a safe and effective cleaning process. Regular maintenance also prevents the need for frequent deep cleaning, keeping your Viking oven in excellent condition for years to come. Proper techniques are key to preserving your investment and ensuring reliable performance.
Preparation Steps Before Starting the Self-Clean Cycle
Before initiating the self-clean cycle on your Viking oven, several preparation steps are crucial for a safe and efficient process. First, remove all oven racks, rack supports, and utensils to prevent damage during high temperatures. Wipe up excessive food spills and splatters from the oven floor to minimize smoke and flare-ups. Ensure the broiler pan and grid are also taken out, as they can melt or warp during the cycle. Close the oven door completely to ensure the self-clean feature works properly. Clear the surrounding area of any flammable materials, and make sure the room is well-ventilated to avoid inhaling fumes. Do not leave any metal utensils or aluminum foil inside, as they can react with high heat. Finally, check the Use and Care Manual for specific instructions tailored to your Viking oven model. Proper preparation ensures the self-cleaning process is both effective and safe, protecting your appliance and home.

Step-by-Step Guide to Viking Oven Self-Cleaning
Remove racks and utensils, then set the oven to self-cleaning mode. Pour water into the broiler pan for steam cleaning. The cycle cleans at high temperatures, lasting about 3.5 hours, leaving ashes to wipe away.
Removing Oven Racks and Utensils
Before initiating the self-cleaning cycle, ensure all oven racks, rack supports, and utensils are removed. This prevents damage and allows proper cleaning. Use oven mitts to safely take out racks, as they may be hot. Place racks in a secure location, such as a large container or on heat-resistant surfaces. Remove any broiler pans, grids, or other accessories. Check the oven thoroughly for any additional items, as leaving them inside can cause damage or create excessive smoke. For racks requiring cleaning, mix baking soda and water to create a paste, apply it, and let it sit before scrubbing. Rinse and dry racks thoroughly. This step ensures the self-cleaning process is effective and safe. Always refer to your Viking oven’s manual for specific guidance on rack removal and preparation.
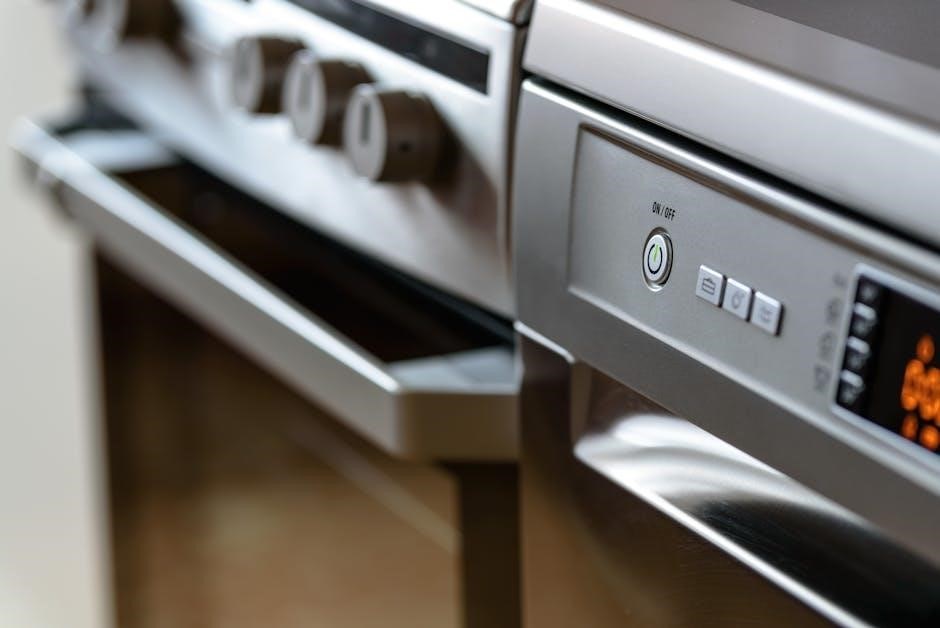
Setting Up the Self-Clean Cycle
Setting up the self-cleaning cycle on a Viking oven involves a few precise steps. First, locate the selector knob and turn it clockwise to the SELF CLEAN mode. Next, adjust the temperature control knob past the designated mark to activate the cycle. This action locks the oven door for safety. The cycle typically lasts around three and a half hours, utilizing high heat to burn food residue. Ensure the oven is empty of racks and utensils, and wipe any excess debris to minimize smoke. Open windows for ventilation due to potential fumes. After completion, the oven will unlock once cooled. Avoid using chemical cleaners and follow the manual for model-specific instructions. Monitor the process for any issues and ensure good ventilation. This setup ensures a safe and effective cleaning process for your Viking oven.
Understanding the Self-Clean Cycle Duration
The self-clean cycle on a Viking oven typically lasts approximately three and a half hours. This duration is designed to ensure thorough cleaning through high heat exposure. During this time, the oven door remains locked to prevent access and ensure safety. The cycle consists of heating to extreme temperatures to burn food residue, followed by a cooling phase. It’s crucial to allow the oven to remain undisturbed throughout the process. After completion, the door will automatically unlock once the interior has cooled sufficiently. Planning is essential, as the cycle cannot be interrupted once started. Proper ventilation is recommended to manage fumes. Always refer to the Use and Care Manual for specific instructions, as cycle times may vary slightly between models. This extended duration ensures a deep clean, leaving the oven interior sanitized and free from tough grime. Patience is key during this process to achieve optimal results.
Safety Precautions During the Self-Clean Cycle
Ensure the kitchen is well-ventilated to prevent fumes from accumulating. Never leave the self-clean cycle unattended, as high temperatures can pose risks. Keep children and pets away from the oven during cleaning. The oven door locks automatically during the cycle and remains locked until it cools down. Avoid using harsh chemicals or cleaners, as they can damage the oven or release harmful fumes. Do not attempt to open the door or interrupt the cycle, as this could cause burns or damage. Keep oven mitts or towels nearby in case of emergencies. Always follow the manufacturer’s guidelines to minimize hazards. Proper ventilation is essential to reduce smoke and odors. Ensure all utensils and racks are removed before starting the cycle. Be cautious of extreme heat emitted during the process. Allow the oven to cool completely before touching or cleaning it further. Safety precautions ensure a secure and effective cleaning experience for Viking oven users.
Post-Cleaning Procedures
After the self-clean cycle, allow the oven to cool completely before wiping the interior with a damp cloth. Clean racks separately with soap and water. Ensure all surfaces are free from residue before restoring the oven to normal use. Always follow safety guidelines to maintain hygiene and functionality.
Cooling Down the Oven After Self-Cleaning
After the self-cleaning cycle completes, it’s crucial to let the oven cool down thoroughly. This process typically takes 3 to 4 hours, depending on the model and intensity of the cycle. During this time, the oven door will remain locked to ensure safety. Avoid opening the door prematurely, as the interior will still be extremely hot. Once the oven has cooled, you can safely proceed to wipe down the interior surfaces. Proper cooling ensures the oven’s components are not damaged and prevents accidental burns. Always follow the manufacturer’s guidelines for cooling times, as specified in the Use and Care Manual. This step is essential for maintaining the oven’s performance and longevity. Remember to ventilate the kitchen during and after cooling to eliminate any lingering fumes or odors; Once the oven is cool, it’s ready for final cleaning and restoration to normal use.
Wipe Down the Oven Interior
Once the oven has completely cooled, use a damp cloth to wipe down the interior surfaces, removing any residue left after the self-cleaning cycle. For tougher spots, a mixture of baking soda and water can be applied. Avoid using abrasive cleaners or scrubbers, as they may damage the oven’s finish. Focus on the walls, floor, and window, ensuring all areas are clean. For the door glass, a gentle paste of baking soda and water can be applied, allowed to sit for 15 minutes, then wiped clean with a damp cloth. This step ensures a sparkling finish without streaks. After cleaning, use a microfiber cloth to dry the surfaces, preventing water spots. Properly cleaning the interior maintains hygiene and ensures optimal performance for future use. Always follow the manufacturer’s guidelines for cleaning products to avoid damage to the oven’s surfaces.
Cleaning the Oven Racks and Rack Supports
Cleaning the oven racks and rack supports is essential for maintaining hygiene and ensuring optimal oven performance. Remove the racks and supports before starting the self-cleaning cycle to prevent them from becoming discolored or difficult to clean. Soak the racks and supports in warm, soapy water for several hours or overnight to loosen grease and food residue. Use a soft sponge or cloth to scrub away any remaining grime, avoiding abrasive cleaners or scrubbers that could damage the finish. Rinse thoroughly with clean water and dry with a microfiber cloth to prevent water spots. For tougher stains, a mixture of baking soda and water can be applied, allowed to sit, then scrubbed off. Once clean, reinstall the racks and supports, ensuring they are secure and properly aligned. Regular cleaning of these components helps maintain the oven’s appearance and functionality, ensuring they continue to perform effectively during cooking and self-cleaning cycles.
Restoring the Oven to Normal Operation
After completing the self-cleaning cycle, allow the oven to cool completely before restoring it to normal operation. Once the oven has cooled, ensure all racks and rack supports are properly reinstalled, making sure they are securely positioned and aligned. Wipe down the oven racks with a clean, damp cloth to remove any residual grime or ash. Inspect the oven interior for any remaining debris and wipe it clean with a soft cloth. Ensure the oven door is fully unlocked and functioning correctly. If your Viking oven has a door lock, check that it disengages properly after the self-cleaning cycle. Finally, reset the oven controls to their normal operating settings and verify that all functions, such as preheating and temperature control, are working correctly. Properly restoring the oven ensures it is ready for its next use and maintains its performance and longevity.
Maintenance and Care Tips
Maintain your Viking oven by using baking soda for tough stains and avoiding harsh chemicals. Regularly inspect and clean racks to prevent grease buildup and ensure smooth operation.
Regular Cleaning to Prevent Grease Buildup
Regular cleaning is essential to maintain your Viking oven’s efficiency and prevent stubborn grease buildup. Start by removing oven racks and utensils before each self-cleaning cycle to ensure thorough cleaning. Wipe down the oven interior with a damp cloth after each use to eliminate food residue. For tougher stains, create a paste using baking soda and water, applying it to affected areas and letting it sit overnight. This method is gentle yet effective for breaking down grease without damaging surfaces. Additionally, avoid using abrasive cleaners or harsh chemicals, as they can harm the oven’s finish. By incorporating these simple steps into your routine, you can keep your Viking oven in pristine condition and ensure optimal performance during self-cleaning cycles.
Using Baking Soda and Water for Glass Cleaning
Cleaning the glass surfaces of your Viking oven can be effectively done using a paste made from baking soda and water. This method is gentle and avoids the use of harsh chemicals. To begin, mix 1 tablespoon of baking soda with 2 tablespoons of water to form a smooth paste. Apply the paste evenly to the glass surfaces using a soft cloth or sponge, ensuring full coverage. Allow the paste to sit for 15-20 minutes to penetrate tough stains. After sitting, use a damp cloth to wipe away the paste and grime. For stubborn spots, lightly scrub with a non-abrasive sponge before wiping clean. This method is safe for the glass and leaves it streak-free and sparkling. Avoid using abrasive cleaners or scrubbers, as they may scratch the glass. Regular use of this technique will keep your Viking oven’s glass surfaces clean and maintain their clarity.
Avoiding Hazardous Oven Cleaners
When cleaning your Viking oven, it is crucial to avoid using hazardous oven cleaners, as they can release toxic fumes and leave harmful residues. These chemicals can damage the oven’s finish and potentially harm your health. Instead, opt for safer alternatives like the self-cleaning feature, which uses high temperatures to burn away food residue. For tougher stains, a mixture of baking soda and water can be effective without exposing you to dangerous chemicals. Always follow the manufacturer’s guidelines and avoid abrasive cleaners or scrubbers, as they may scratch the oven surfaces. If you prefer store-bought products, choose eco-friendly or non-toxic options specifically designed for ovens. Remember, the self-cleaning cycle is a convenient and chemical-free method to maintain your Viking oven’s cleanliness and performance.
Scheduling Routine Maintenance
Regular maintenance is essential to ensure your Viking oven operates efficiently and safely. Schedule routine checks every 1-3 months, depending on usage, to prevent grease buildup and maintain performance. Always refer to your Viking oven’s Use and Care Manual for specific maintenance recommendations. Plan to run the self-clean cycle monthly or every few months to remove food residue. Additionally, inspect and clean oven racks, rack supports, and the broiler pan regularly. Check for worn-out seals or damaged parts and replace them promptly to avoid heat loss or safety hazards. For exterior maintenance, wipe down the doors and handles with a soft cloth and mild soap to remove fingerprints and smudges. By scheduling routine maintenance, you can extend the lifespan of your Viking oven, ensure optimal functionality, and prevent costly repairs. Consistency in upkeep will also enhance your cooking experience and overall satisfaction with the appliance.
Troubleshooting Common Issues
Troubleshooting Common Issues during the Viking oven self-cleaning involves addressing errors, resolving smoke or odor problems, and fixing a stuck door. Refer to the manual for specific guidance and solutions to ensure safe and effective cleaning.
Resolving Errors During the Self-Clean Cycle
If errors occur during the self-clean cycle, such as an “E” code or the oven not starting, check if the door is fully closed and ensure all racks and utensils are removed. Verify that the oven selector knob is correctly set to the SELF CLEAN mode and the temperature control knob is properly positioned. If issues persist, refer to the Use and Care Manual for specific error codes and solutions. It is important to follow the manufacturer’s instructions precisely to resolve any malfunctions. Additionally, ensure no foreign objects are inside the oven that could interfere with the cleaning process. Always allow the oven to cool down completely before attempting any manual interventions. Remember, safety is paramount, so avoid forced interventions that could damage the appliance or pose a risk to you. If problems continue, contact Viking customer support for professional assistance.
Addressing Smoke or Odors During Cleaning
Smoke or odors during the self-clean cycle are common due to the high heat burning food residue. To minimize this, ensure the oven is clear of heavy debris and wipe up spills before starting. If smoke appears, ensure proper ventilation by opening windows or turning on exhaust fans. Check that the oven vent is not blocked, as this can exacerbate the issue. Avoid opening the oven door during the cycle, as this can release harmful fumes. If odors linger after cleaning, leave the oven door ajar to allow it to cool and air out. For persistent smells, mix baking soda and water, apply to interior surfaces, and let it sit before wiping clean. Always follow Viking’s guidelines to ensure safety and effectiveness during the self-cleaning process.
Fixing a Stuck Oven Door After Self-Cleaning
If your Viking oven door becomes stuck after the self-cleaning cycle, it is likely due to the high heat causing expansion or the door lock engaging. Allow the oven to cool completely, as the door may unlock naturally once it returns to room temperature. Check the door lock indicator to ensure it is not engaged. If the door remains stuck, gently wiggle the handle while pulling it open. Avoid using force, as this could damage the door or hinges. If the issue persists, lightly spray a food-safe silicone-based lubricant around the door hinges and let it sit for a few minutes before attempting to open. Regular maintenance, such as cleaning the hinges and lock mechanism, can help prevent this issue in the future. Always refer to your Viking oven’s Use and Care Manual for specific guidance on resolving door-related problems.
The Viking oven self-cleaning feature offers a convenient and efficient way to maintain your appliance, using high heat to eliminate food residue. Always prioritize safety by following the manufacturer’s instructions and allowing the oven to cool completely before cleaning. Regular maintenance, such as wiping down surfaces and avoiding harsh chemicals, ensures optimal performance. For issues like a stuck door, patience and gentle maneuvers are key. By adhering to these guidelines, you can enjoy a clean, functional oven while extending its lifespan. Proper care and attention will keep your Viking oven in excellent condition, ready for years of reliable service. Remember, consistent upkeep enhances both safety and efficiency, making your cooking experience enjoyable and hassle-free.